Importing and Exporting Data
Importing Data into your Ushahidi deployment
The Data Import feature allows you to import posts into the platform. It is particularly useful in cases where:-
- You need to upload posts in bulk
- You need to upload posts that people can’t send to you via email/phone but have the data available in CSV format
- (In future) You are transferring data from one platform to another
To import a CSV File,
- On the left hand menu bar, click on Settings

- Then, click on Data Import

- You’ll get redirected to the import page, as shown below.

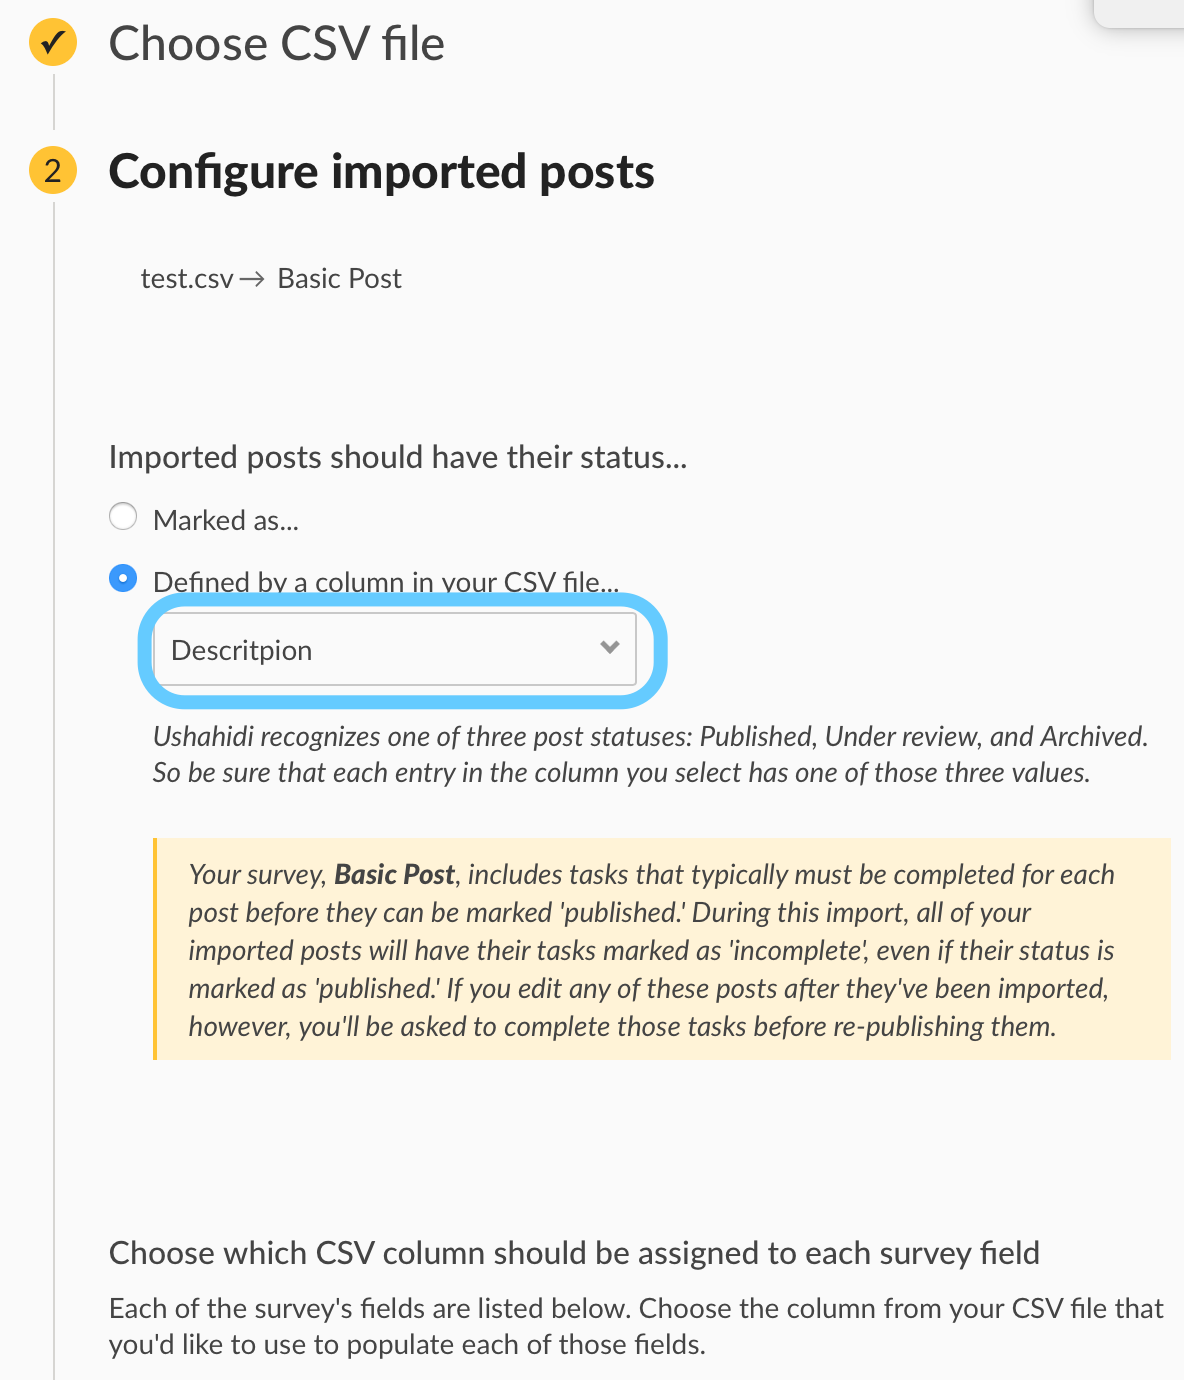
- Select a survey you’d like to match the data you’re uploading to. This field is populated with a list of all existing surveys on your deployment.
- Choose the CSV file you would like to upload. Make sure that
- You are uploading a file in CSV format. Any other file formats are not accepted
- Your CSV file size does not exceed 2MB
- Your CSV file has Column headers( these will be useful when mapping your CSV column to the survey fields)
- Geographic location information is separated into two columns; one for Latitude, and the other for Longitude.
See below for a sample CSV file 
- Click on Continue and follow the instructions below.
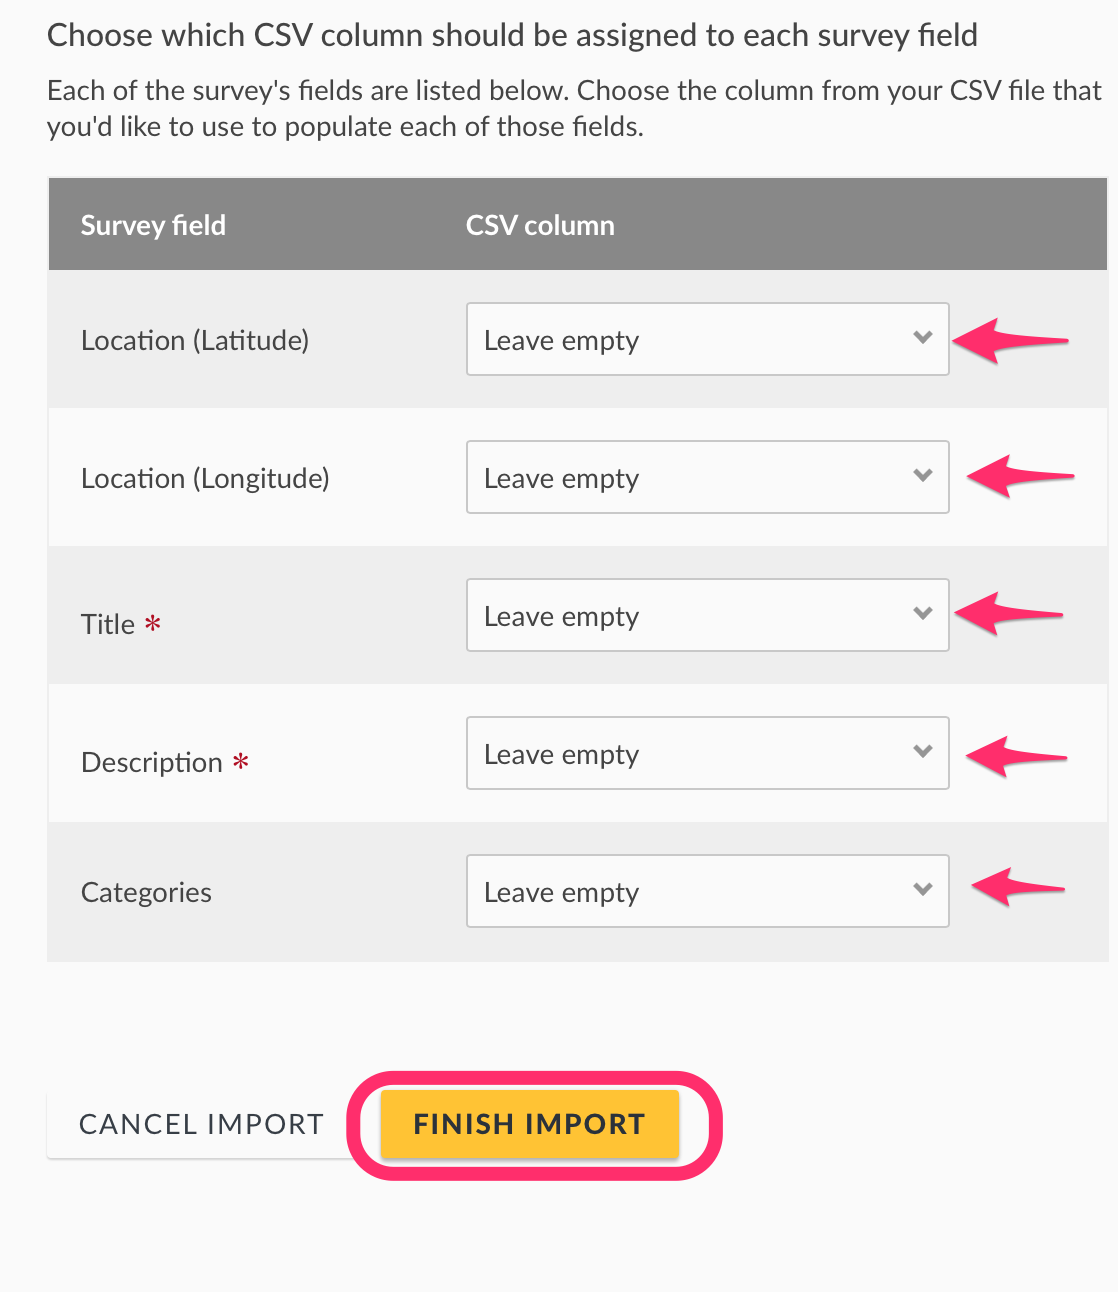
- On successful file upload, you’ll need to assign your CSV Columns to post fields, as illustrated below.
- Click on Finish Import
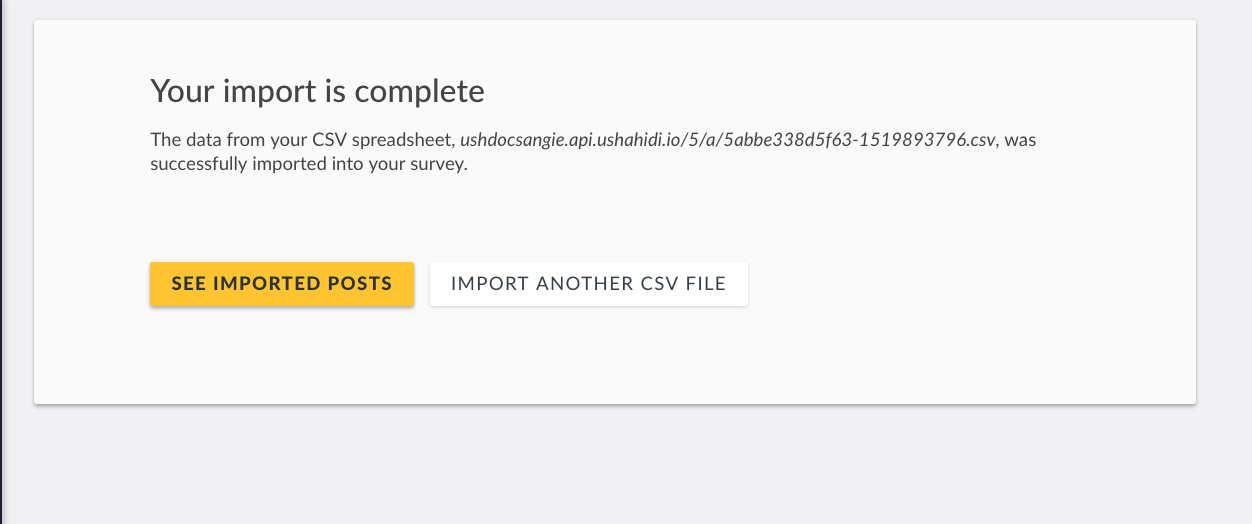
- If successfully uploaded, You’ll receive notices as follows.

Exporting data
The platform now allows for data export, enabling you to download posts from the platform in CSV format. You can download posts from your map mode, Data mode, saved searches and collections you have access to, or based on custom criteria( search filters set by you as a user).
To export a CSV file,
- Click on saved search/collection you’d like to export data from.
- You can also use the Search section on your header to filter posts you would like to export based on specific criteria
- Once done, click on the Share button on the right hand of your header menu

Then click on Export to CSV as shown below:

- A small confirmation box will appear seeking confirmation on whether you would like to proceed with exporting your data.
- Click on OK to export your CSV file
- Click on Cancel if you would like to terminate the export process

- You should get a CSV file named after your deployment name in your downloads folder
The Data Import feature allows you to import posts into the platform. It is particularly useful in cases where:-
- You need to upload posts in bulk
- You need to upload posts that people can’t send to you via email/phone but have the data available in CSV format
- (In future) You are transferring data from one platform to another
To import a CSV File,
- On the left hand menu bar, click on Settings
- Then, click on Data Import
- You’ll get redirected to the import page, as shown below.
- Select a survey you’d like to match the data you’re uploading to. This field is populated with a list of all existing surveys on your deployment.
- Choose the CSV file you would like to upload. Make sure that
- You are uploading a file in CSV format. Any other file formats are not accepted
- Your CSV file size does not exceed 2MB
- Your CSV file has Column headers( these will be useful when mapping your CSV column to the survey fields)
- Geographic location information is separated into two columns; one for Latitude, and the other for Longitude.
See below for a sample CSV file
- Click on Continue and follow the instructions below.
- On successful file upload, you’ll need to assign your CSV Columns to post fields, as illustrated below.
- Click on Finish Import
- If successfully uploaded, You’ll receive notices as follows.
The platform now allows for data export, enabling you to download posts from the platform in CSV format. You can download posts from your map mode, Data mode, saved searches and collections you have access to, or based on custom criteria( search filters set by you as a user).
To export a CSV file,
- Click on saved search/collection you’d like to export data from.
- You can also use the Search section on your header to filter posts you would like to export based on specific criteria
- Once done, click on the Share button on the right hand of your header menu
Then click on Export to CSV as shown below:
- A small confirmation box will appear seeking confirmation on whether you would like to proceed with exporting your data.
- Click on OK to export your CSV file
- Click on Cancel if you would like to terminate the export process
- You should get a CSV file named after your deployment name in your downloads folder